Yoga Postures For Beginners Over 50
My mother started yoga at sixty-two. She had never exercised before. Her doctor told her to move more. She was scared of falling. She thought yoga was for young people. She was wrong.
Two years later she moves better than me. She gets up from the floor without help. She carries groceries without back pain. She sleeps through the night. Her blood pressure went down. Her mood improved.
This happens to many people. Your body wants to move. It just needs the right way to yoga postures for beginners over 50.
What Changes After 50s?
Your body changes as you get older. Muscles get weaker. Joints get stiffer. Balance gets worse. These things happen slowly. You might not notice them at first. But here is the good news. You can slow these changes down. You can even reverse some of them. Movement helps. Yoga helps a lot. The key is knowing how to move safely. Your body is not broken. It just needs different care than before.
Read Also: Yoga Postures For Lower Back Pain Relief
Why This Works For Older Bodies?
Yoga works well for people over fifty for a few reasons.
First, you control how far you go. No one pushes you. You listen to your body. You stop when it hurts. This is very important at any age.
Second, yoga uses your own weight. You do not need heavy weights or machines. Your body provides the resistance. This builds strength without stressing your joints.
Third, yoga works on balance. This is huge for older adults. Better balance means fewer falls. Fewer falls means you stay independent longer.
Fourth, yoga calms your nervous system. Stress hurts your body in many ways. It raises blood pressure. It ruins sleep. It makes pain worse. Yoga lowers stress naturally.
Before You Start
Let me tell you some things that matter before you try any pose.
Get cleared by your doctor. This is not optional. Your doctor knows your health history. They can tell you if yoga is safe for you. Some health conditions need special care. High blood pressure is one example. Recent surgery is another.
Do not push through pain. This is different from discomfort. Discomfort feels like a stretch. Pain feels sharp or stabbing. If you feel pain, stop. Back off. Try something easier.
Use support. Chairs are your friends. Walls are your friends. Blocks and straps help too. These things do not make you weak. They make you smart. They let you do poses safely.
Breathe normally. Many people hold their breath during exercise. Do not do this. Keep breathing. In through your nose. Out through your nose. Your breath tells your body to relax.
Start with less. Do three poses. Do them for five minutes. See how you feel the next day. If you feel good, add more. If you feel sore, do less. This is how you learn your limits.
Wear comfortable clothes. Nothing tight. Nothing that binds. You need to move freely. You also need to see your feet in standing poses.
Have an empty stomach. Wait two hours after eating. A full stomach makes yoga uncomfortable. You might feel sick. You might get cramps.
The Poses
These poses are chosen for safety. They work for people with stiff joints. They work for people with low fitness. They work for people who have never done yoga before.
I will tell you exactly how to do each one. I will tell you what it helps. I will tell you how to make it easier.
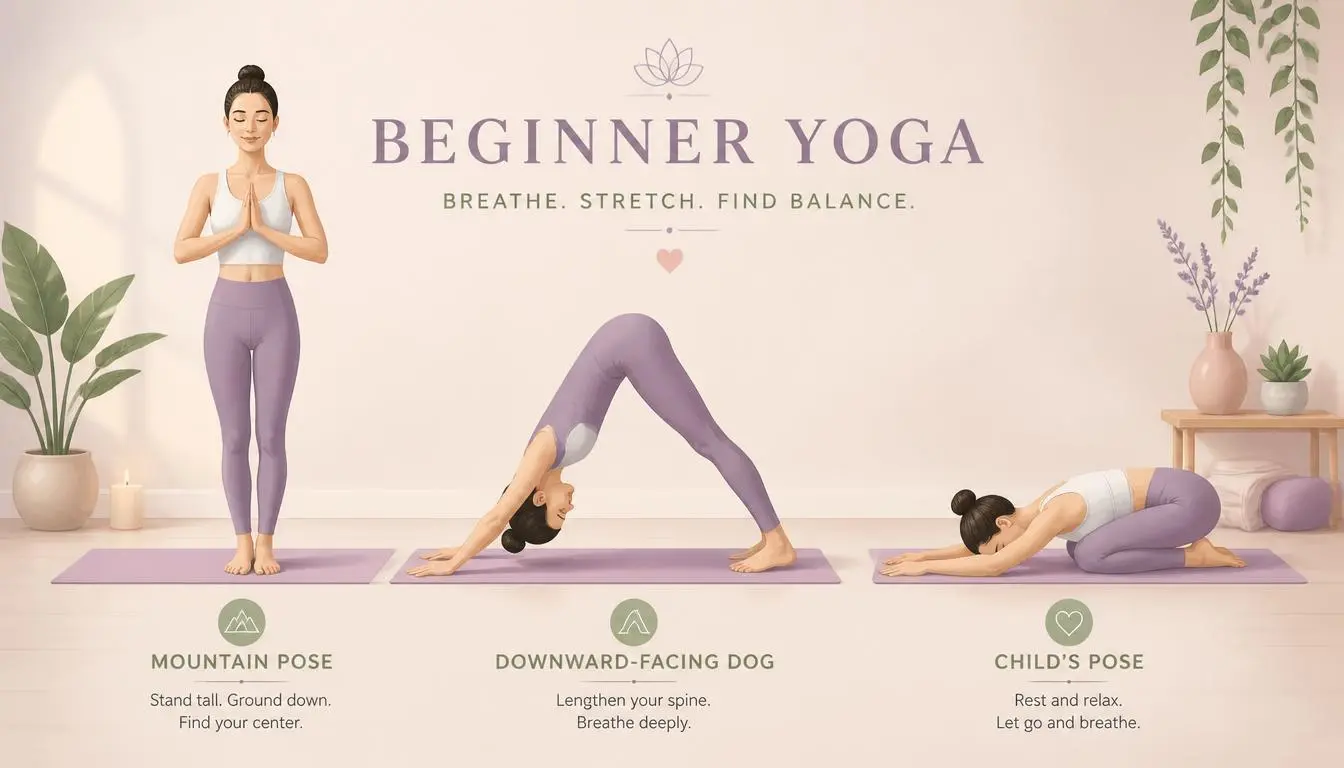
Mountain Pose
This pose looks simple. It is simple. That is why you start here.
What to do:
Stand with your feet apart. Keep them hip-width apart. That means the space between your feet matches the space between your hip bones. Spread your weight evenly on both feet. Do not lean forward. Do not lean back.
Stand tall. Imagine someone is pulling a string from the top of your head. Your chest opens. Your shoulders roll back. Your chin stays level with the floor.
Let your arms hang down. Your palms face forward. Your fingers relax.
Breathe here for five breaths. Feel your feet on the floor. Notice your weight. Notice your posture.
What it does:
This pose teaches you to stand correctly. Most of us stand badly. We slouch. We lean. This hurts our backs. Mountain pose fixes that. It also strengthens your legs. It makes you aware of your body.
Making it easier:
Stand with your back against a wall. This gives you support. It also shows you where your spine should be. You can also do this sitting in a chair. Sit tall. Keep both feet on the floor.
Chair Pose
This pose gets your legs working. It also helps your balance.
What to do:
- Stand behind a chair. Place your hands on the back of the chair. Keep your feet hip-width apart.
- Slowly bend your knees. Lower your hips like you are going to sit down. Do not go too far. Just a small bend.
- Keep your chest lifted. Look straight ahead. Hold for a few breaths.
- Slowly straighten your legs and yoga postures for beginners over 50.
What it does:
This builds strength in your thighs. Strong thighs help you get out of chairs. They help you climb stairs. They help you walk. This pose also strengthens your core.
Making it easier:
Bend your knees less. Even a tiny bend works. Hold the chair with both hands. Keep your back straight. Do not let your knees go past your toes.
Cat And Cow
This is two poses together. They move your spine. Your spine needs movement. It gets stiff from sitting.
What to do:
- Start on your hands and knees. Your hands go under your shoulders. Your knees go under your hips. Keep your back flat.
- Breathe in. Drop your belly down. Lift your chest up. Look forward. This is cow pose.
- Breathe out. Round your back up like a cat. Tuck your chin to your chest. This is cat pose.
- Move slowly. Match your breath to the movement. Do this ten times.
What it does:
This makes your spine flexible. It stretches your back muscles. It opens your chest. It also massages your internal organs. Many people feel relief from back stiffness.
Making it easier:
Do this sitting in a chair. Place your hands on your knees. Breathe in and arch your back. Breathe out and round your back. You get the same benefits without getting on the floor. This version works very well for beginners.
Warrior
This pose makes you feel strong. It builds strength and confidence.
What to do:
- Stand with your feet wide apart. Turn your right foot out to the side. Turn your left foot slightly in.
- Raise your arms out to the sides. They should be level with the floor.
- Bend your right knee. Go only as far as comfortable. Keep your knee over your ankle. Do not let it go past.
- Look over your right hand. Hold for three breaths.
- Straighten your leg. Turn your feet the other way. Do the other side.
What it does:
This works your legs hard. It also works your arms and shoulders. It opens your hips and chest. Many people feel more energized after this pose.
Making it easier:
Do not bend your knee as much. A shallow bend is fine. Hold onto a chair or wall for balance. This takes the worry out of the pose. You can also keep your hands on your hips instead of raising them.
Tree Pose
This pose tests your balance. It also makes your balance better over time.
What to do:
Stand next to a wall or chair. You will need it for support.
Shift your weight onto your left foot. Lift your right foot off the floor. Place the sole of your right foot on your left leg. Put it below the knee or above the knee. Never put it on the knee itself. Bring your hands together in front of your chest. Find a spot to look at. This helps your balance. Hold for five breaths. Slowly lower your foot. Switch sides.
What it does:
This improves your balance. It strengthens your ankles. It strengthens your legs. Better balance means fewer falls. This is one of the most useful poses for older adults.
Making it easier:
Keep your hands on the chair. Do not lift your foot high. Just rest your toes on the floor next to your standing foot. This still works your balance. You can also keep your foot on the floor and just lift your heel.
Legs Up The Wall
This is a rest pose. You do not work hard here. You just let your body relax.
What to do:
- Sit on the floor next to a wall. Swing your legs up onto the wall. Lie down on your back. Scoot your hips close to the wall.
- Relax your arms at your sides. Close your eyes. Breathe normally.
- Stay here for five to ten minutes. This is a great way to end your practice.
What it does:
This rests your legs. It reduces swelling in your feet and ankles. It helps blood flow back to your heart. It calms your whole nervous system. Many people find this pose very relaxing.
Making it easier:
Put a pillow under your lower back. This raises your hips. It makes the pose more comfortable. You can also bend your knees and rest your feet on the wall.
Sphinx Pose
This pose opens your chest. It also strengthens your back.
What to do:
- Lie on your stomach. Stretch your legs out behind you. Rest your forehead on the floor.
- Place your elbows under your shoulders. Rest your forearms on the floor.
- Press into your forearms. Lift your chest off the floor. Keep your neck long. Do not crank your head back.
- Hold for three breaths. Lower your chest back down.
What it does:
This strengthens your spine. It opens your chest and shoulders. It helps correct slouching. Many people feel relief from upper back pain.
Making it easier:
Put a pillow under your chest. This supports your weight. Lift your chest only a little bit. You do not need to go high.
Corpse Pose
This is the final pose. It is the most important one.
What to do:
- Lie on your back. Let your legs relax. Let your arms relax at your sides. Turn your palms up.
- Close your eyes. Let your whole body go. Let your jaw relax. Let your shoulders drop. Let your belly soften.
- Stay here for five to fifteen minutes. This is not sleeping. This is active relaxation. You are awake but completely relaxed.
What it does:
This lets your body absorb all the benefits of your practice. It lowers stress. It calms your mind. It helps you feel peaceful.
Making it easier:
Put a pillow under your knees. This takes pressure off your lower back. Put a folded blanket under your head. Get comfortable.
You May Also Like: Yoga Postures For Improving Blood Circulation Naturally
How Often Should You Practice?
- Consistency matters more than length. Five minutes every day is better than an hour once a week.
- Start with three times a week. Do ten minutes each time. Do the poses that feel good to you.
- After a few weeks, add another day. Work up to daily practice if you can.
- Some days you will feel great. Other days you will feel tired. On tired days, do less. Do one or two poses. This keeps the habit going.
What To Expect?
- Your body will change slowly. Do not expect miracles in a week.
- In the first month, you might notice better sleep. You might feel less stressed. You might notice less back pain.
- In the second month, you might feel stronger. Getting out of a chair might feel easier. Walking might feel easier.
- In the third month, you might notice better balance. You might catch yourself before you fall. You might feel more confident on your feet.
- These are real changes. Many people experience them. The key is to keep going.
FAQs
What if I cannot get on the floor?
Do all poses in a chair. Every pose in this guide has a chair version. You get the same benefits.
What if I have bad knees?
Be careful with standing poses. Do not bend your knees deeply. Use a chair for support. Skip poses that hurt.
What if I have high blood pressure?
Talk to your doctor first. Avoid poses where your head goes below your heart. This means no forward folds. Stay upright.
What if I am overweight?
Yoga works for all body types. Use support. Use a chair. Go slowly. Your body will adapt.
What if I am not flexible?
That is why you are here. Flexibility comes with practice. Start where you are. Do not compare yourself to others.
A Simple Routine To Start
Here is a routine for your first week. Do this every other day.
- Mountain Pose: 3 breaths
- Chair Pose: 3 breaths, rest, repeat 3 times
- Cat and Cow: 5 rounds
- Warrior: 3 breaths each side
- Tree Pose: 3 breaths each side
- Legs Up The Wall: 5 minutes
- Corpse Pose: 5 minutes
This takes about fifteen minutes. It covers all the basics. It is safe and gentle.
Staying Safe Long Term
As you practice more, remember these things.
- Listen to your body every day. Your body changes. Some days you can do more. Some days you need to do less.
- Do not compete with anyone. This is your practice. Your body is different from everyone else.
- Keep using support. Chairs and walls are not crutches. They are tools. They help you do poses correctly.
- Breathe. Never hold your breath. Your breath guides your movement.
- Rest when you need to. Rest is part of the practice.
Final Words
Yoga is for everyone. It is for young people. It is also for people over fifty. It is for people who have never exercised. It is for people with stiff joints. Your age does not stop you from starting. Your fitness does not stop you. Your flexibility does not stop you.
- The only thing that stops you is not starting.
- Pick one pose from this guide. Do it today. Do it for two minutes. See how it feels.
- Tomorrow do two poses. The next day do three.
- That is how you build a practice. One small step at a time.
- Your body will thank you. Your mind will thank you. You will feel better.